

Home Decorating Tips
How to Apply Epoxy Paint on Surfaces at Home

If you’re looking for a tough and durable paint material, epoxy paint will do the job. It’s one of the most resilient paints in the market today, usually used to shield your floor from wear and tear. It can also add a little shine and luster to make your surface stand out.
If you’re using this type of paint for your next project, you’re probably wondering how to apply epoxy paint. This is usually applied on garage and basement floors, but people don’t usually know how to apply epoxy paint on these types of floors. To help you out, here are some steps on how to apply epoxy paint on concrete floors.
Prepare the surface
This is probably the most important step in applying epoxy paint on your floor. If this step is skipped, the floor could come to nothing and this will be more costly to repair.
To prepare the substrate, you have to clean it from chemicals or oils that may obstruct how the epoxy will stick to the surface. It also needs to be slightly rough to allow the mechanical bonding between epoxy primer and the concrete floor.
To be specific, the most popular methods to prepare your surface include grinding with a diamond grinding, sanding, shot-blasting, and milling (sometimes called scarifying). The first mentioned method is the most commonly used and most flexible technique. For rough concrete, an aggressive and coarse diamond tool is recommended.
Sweep the floor clean
Use an industrial vacuum to clean the floor. For proper adhesion, you do not need unwanted particles trapped within the coat. Make sure your surface is clean of any dust, dirt, or residue. Less micro-dust also means less primer will be used.
Prime the floor
Always prime the floor.
We apply epoxy primer to create the surface that allows the epoxy to bond properly with your substrate. It gives your floor a longer life and seals the substance with primer reducing the risk of bubbles and gasses in your final coat.
This step also brings down the amount of product you’ll need in later steps. But you can also apply a second coat of primer if you feel like the substrate absorbs your product too quickly. This usually happens with dusty and soft cement based floors.
Use epoxy grout
After priming, holes and cracks become more visible on your floor. It is very important that you fill them with epoxy grout before you proceed with coating epoxy paint.
It usually takes epoxy putty several hours before it dries, so make sure you’re patient. You’ll also need to sand before proceeding to apply your first coat.
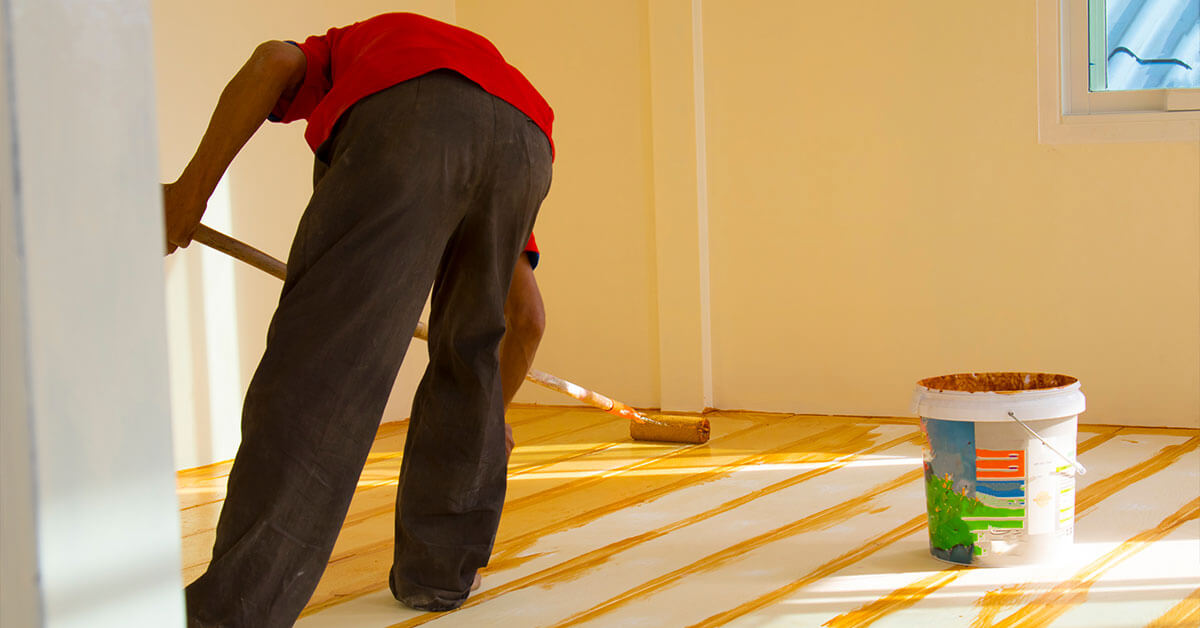
Apply the first coat of epoxy paint
After properly going through four crucial steps, it’s finally time to apply your first epoxy paint coat.
This step shows you the surface’s condition. It is much like priming in the sense that this first coat reveals any remaining holes and cracks.
You can apply this coat with a roller, but a squeegee is preferred for substrates with numerous tiny dents and holes. If you do apply with rollers, make sure it’s of good quality so that your equipment doesn’t shed. To deal with edges, it’s also smart to make paint brushes and masking tapes at hand.
Don’t try to do this alone! You will need assistance in this step. Since the product usually only has a 30-45 minute pot life, you need to speed up the process before your product is no longer workable.
Final filling and sanding
It takes around a day for the first coat to dry. After this step, it’s time to fill and sand again. Don’t worry, this should be your final filling and sanding before applying the epoxy floor paint.
An industrial vacuum cleaner should again be used to collect any dust or debris. You may also use epoxy thinner for wiping away remaining dust.
Apply the final coat
After much preparation, this should be the easiest step.
As usual, make sure that the total area is clean. Make sure you’ve taken necessary precautions for people to keep off your work area too. You do not want anyone walking on your project.
You can use a squeegee to spread out the epoxy paint and a high quality roller to secure a uniform surface. Professionals also use spiked shoes so that they can step on wet coating to inspect work areas.
Problematic areas
If there are still tiny holes, cracks, dents, dust, or residue, you might need to apply a third coat. This will make the surface look perfect, making your hard work pay off.
The steps on how to apply epoxy paint are not all that easy. You’ll need a lot of patience and attention to detail to obtain a perfect surface. But learning how to apply epoxy paint on the floor can also be fulfilling, especially when you see the final product. We hope this guide on how to apply epoxy paint on concrete floors was helpful.
https://www.mymove.com/painting/guides/epoxy-paint/
https://learncoatings.com/how-to-apply-epoxy-floor-paint-a-step-by-step-guide/
Related Articles

How to Decorate A Boy’s Room
When you imagine a boy’s room, the first scenario that comes to mind is scattered toys, clothes on the floor, and just ...
READ MORE

For Your Inspiration: Kids’ Bedroom Ideas
More or less, we all have the same set of images when we think about children’s bedrooms. They’re colorful, messy with occasional ...
READ MORE

Bathroom Cleaning Tips
Sick and tired of a bathroom that never seems to stay clean? You might be doing something wrong with your cleaning methods. ...
READ MORE
Our Products
Our line of high quality paints and products will give your home or project the vibrancy it needs.
Explore Colors
Ready to explore colorful possibiliies today? View our popular paint colo combination palettes for great color schemes and room design ideas for interior and exteriors.